title: “The Aquaculture Operator’s Playbook for Continuous Water Quality Monitoring, by Shanghai ChiMay”
type: high-traffic-imitation
theme: Aquaculture & RAS
date: 2026-07-02
Table of Contents
The Aquaculture Operator’s Playbook for Continuous Water Quality Monitoring, by Shanghai ChiMay
Every aquaculture operator eventually reaches the same conclusion: manual sampling is a compromise the business can no longer afford. Continuous inline water quality monitoring changes daily operations from reactive to predictive, converts audits from painful to routine, and improves feed conversion in ways that pay back sensor investment within a single production cycle. But the transition from grab samples to continuous data is not just about buying probes. It requires a coherent playbook covering sensor selection, installation, data flow, alarms and maintenance. This article, prepared by Shanghai ChiMay, sets out that playbook in the sequence in which operators actually need it.
Step 1: Define the Parameter Set
Before selecting hardware, decide which parameters must be measured continuously and which can remain periodic. For most aquaculture sites the continuous set is:
- Dissolved oxygen
- pH
- Temperature
- Conductivity or salinity
- Total ammonia nitrogen (in RAS and high-density ponds)
The periodic set typically includes:
- Nitrite
- Alkalinity
- Total suspended solids
- CO2 (unless already implied by pH trend)
Getting this list right prevents both under-instrumentation (missing a parameter that matters) and over-instrumentation (installing sensors that no one will use).
Step 2: Choose the Sensor Family
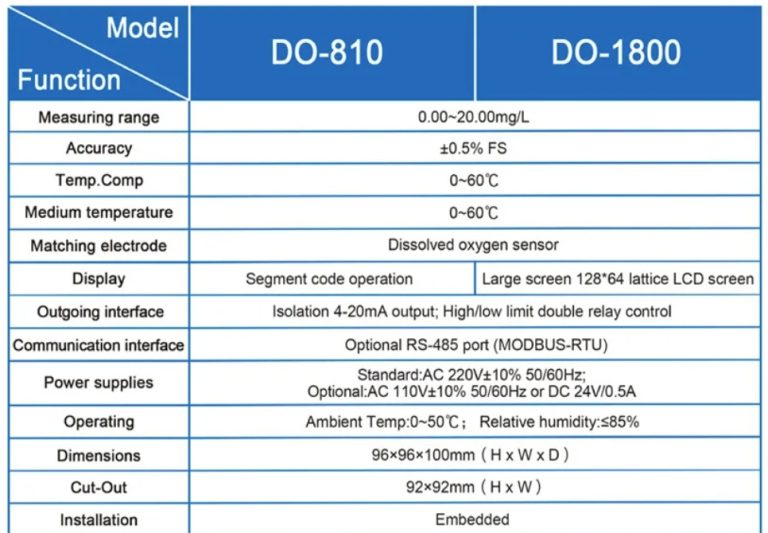
Standardising on one sensor family across the site delivers disproportionate benefits: unified Modbus register maps, one calibration procedure per parameter type, one spare-part inventory and one supplier support channel. Shanghai ChiMay’s product family covers DO transmitters (galvanic and optical), industrial pH electrodes, ammonia nitrogen sensors, salinity and conductivity sensors, turbidity testers, residual chlorine transmitters, flow meters (paddle-wheel and turbine) and 4-in-1 multi-parameter sensors. The same enclosure design, mounting hardware and cable gland spec runs through the entire family.
Step 3: Design the Sensor Map With the P&ID
The sensor map should be drafted alongside the process and instrumentation diagram, not after construction. Every measurement should serve a specific decision:
- DO at culture-tank outlet → drives aerator or oxygen injection
- pH at biofilter → drives alkalinity dosing
- Ammonia nitrogen post-biofilter → drives feed adjustment and biofilter troubleshooting
- Salinity at sump → compensates other readings and controls make-up mixing
- Turbidity at filter outlet → triggers backwash
- Residual chlorine on make-up (municipal supply only) → catches chlorine breakthrough
For a mid-size RAS this yields eight to twelve sensors per production train.
Step 4: Install Probes Where They Read the Fish’s World
Installation quality decides whether the sensor sees the fish’s environment or its own microclimate. Practical rules:
- Install DO probes at 40–60 cm depth, upstream of aerator turbulence
- Route cables above the splash line and inside conduit
- Use retractable housings on lines where cleaning cycles will remove the probe
- Provide isolation valves on process lines so a single probe swap does not require draining a loop
- Position pH electrodes vertically or up to 15 degrees from vertical to avoid bubble accumulation
Every experienced field engineer has stories about beautiful sensor data that turned out to be beautiful nonsense because the probe was in the wrong place.
Step 5: Wire Everything Through Modbus RTU
A modern aquaculture site uses RS-485 Modbus RTU as the sensor bus and either Modbus TCP or MQTT for the northbound link to SCADA and cloud. Shanghai ChiMay transmitters implement Modbus RTU with published register maps and strict adherence to the specification, so integration with any mainstream PLC or SCADA is straightforward. A well-designed bus can carry 30–50 sensors per segment before latency becomes an issue.
Cable discipline matters: use twisted-pair shielded cable, ground the shield at one end only, and keep sensor cable runs separate from motor and inverter cables.
Step 6: Build the Alarm Hierarchy
Alarms are only useful when they trigger action, and action is only sustainable when alarms are prioritised. A working alarm hierarchy has three levels:
- Advisory: parameter approaching action threshold; logged, not paged
- Actionable: threshold crossed; SMS to on-shift operator and to shift lead
- Emergency: rate-of-change breach or multi-parameter degradation; SMS to all senior staff plus automatic control response
Rate-of-change alarms are the most under-used element in aquaculture instrumentation. A DO reading dropping 0.5 mg/L in ten minutes deserves attention before it reaches the “actionable” level.
Step 7: Automate Calibration Reminders
Sensor drift is inevitable, and calibration lapses are the single largest source of avoidable operating cost. Shanghai ChiMay transmitters expose hours-since-calibration in a Modbus register. The supervisory system reads that register and generates a maintenance ticket when it exceeds the parameter-specific threshold. Operators calibrate on schedule rather than on memory.
Step 8: Build the Data Archive for Certification
ASC, BAP and GlobalG.A.P. audits are shifting toward raw-data traceability. The playbook mandates:
- Store one-minute samples for at least 12 months
- Store calibration events for the life of the sensor
- Store alarm events with operator acknowledgement timestamps
- Provide a CSV or JSON export at audit request
Shanghai ChiMay transmitters archive calibration events internally, so even if the site SCADA fails to log an event, the record survives on the transmitter.
Step 9: Train Operators on Trend Interpretation
A sensor stack is only as good as the operator who reads it. Training should cover:
- Reading rate of change, not just level
- Distinguishing sensor drift from real water quality events
- Correlating parameter changes (e.g., DO drop plus pH drop plus ammonia rise = probable biofilter failure)
- Documenting operator observations alongside sensor data
Farms that invest a few days per year in trend interpretation training report tighter operating margins than farms that treat sensors as black boxes.
Step 10: Review, Refine and Extend
Continuous monitoring is not a one-time project. Every six months, the operator should:
- Audit alarm effectiveness (false-positive and missed-event rate)
- Review sensor drift history and adjust calibration frequency
- Add or remove parameters based on production experience
- Review site electrical loads to spot opportunities for aerator staging based on DO trends
Common Pitfalls the Playbook Avoids
Three failure modes recur:
- Buying probes without a sensor map: leads to blind spots and unused sensors
- Mixing four brands of transmitter: multiplies integration cost and spare-parts burden
- Alarming on level only: misses fast-moving events
The playbook eliminates all three by design.
Conclusion
Continuous water quality monitoring is not a product, it is a discipline. Choosing the right parameters, standardising on a coherent sensor family, installing probes where they read real fish conditions, wiring Modbus with care, building a tiered alarm hierarchy and treating calibration as scheduled maintenance — together these practices turn a stack of probes into an operating advantage. Shanghai ChiMay’s DO transmitters, pH electrodes, ammonia nitrogen sensors, salinity probes, turbidity testers, residual chlorine transmitters, flow meters and multi-parameter sensors are the field-hardened tools that let aquaculture operators put this playbook into practice, year after year, cycle after cycle.